
Every so often we hear stories of people losing their mobile phones, often with sensitive photos on them. Additionally, people may lend their phones to friends only to have those friends start going through their photos. For whatever reason, a lot of people store risqué pictures on their devices. Why they feel the need to do that is left for another discussion. This behavior has fueled a desire to protect photos on mobile devices.
One popular option are photo vault applications. These applications claim to protect your photos, videos, etc. In general, they create albums within their application containers and limit access with a passcode, pattern, or, in the case of newer devices, TouchID.
I decided to take a look at some options for the iOS platform. I did a quick Google search for “best photo vaults iOS” and got the following results:
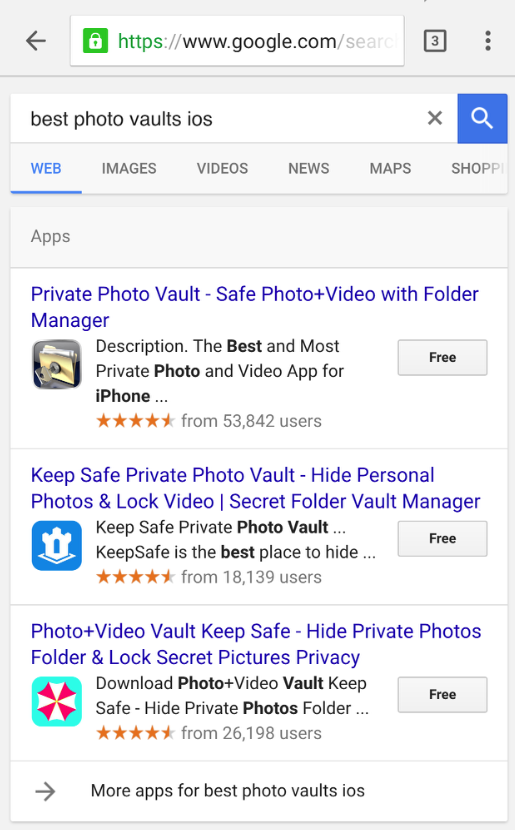
Figure 1: Search results for best iOS photo vaults
I downloaded the free applications, as this is what most typical users would do. This blog post discusses my findings.
Lab Setup
- Jailbroken iPhone 4S (7.1.2)
- BurpSuite Pro
- Hex editor of choice
- Cycript
Applications Reviewed
- Private Photo Vault
- Photo+Video Vault Keep Safe(My Media)
- KeepSafe
I will cover the common techniques I used during each iOS application assessment. Additionally, I will take a deeper look at the Private Photo Vault application and get into some actual reverse engineering. The techniques discussed in the reverse engineering section can be applied to the other applications (left as an exercise for the reader).
Note: Unless otherwise stated, all commands are issued from Mac OS after having ssh’d into the jailbroken mobile device.
Private Photo Vault
The first application I looked at was Private Photo Vault. As it turns out, there have been several write-ups about the security, or lack thereof, of this application (see the references section for additional details). Because those write ups were published some time ago, I wanted to see if the developers had corrected the issues. As it turns out, the app was still vulnerable to some of the issues at the time of writing this post.
Bypassing the Lock Screen
When the app launches, the user is presented with the following screen:
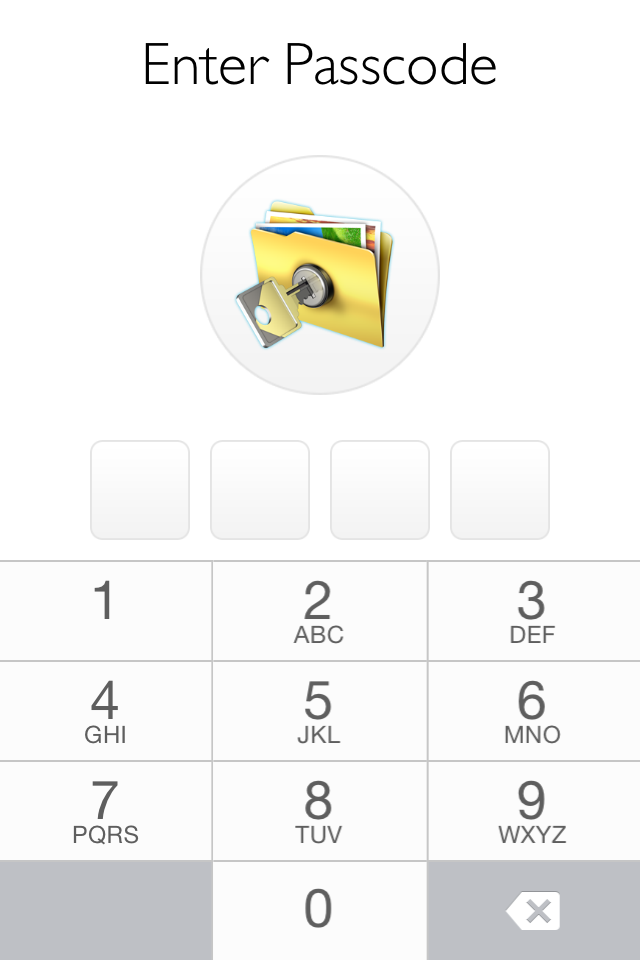
Figure 2: Private Photo Vault Lock Screen
Bypassing this lock screen was trivial. The first step is to identify the Photo Vault process and then attach to it with cycript. For those not familiar with cycript, the following is taken from the cycript.org site:
“Cycript allows developers to explore and modify running applications on either iOS or Mac OS X using a hybrid of Objective-C++ and JavaScript syntax through an interactive console that features syntax highlighting and tab completion.”
To identify the Photo Vault process we issue the following commands:
ps –e | grep “Photo”
And then attach to it as shown:
cycript –p PhotoVault

Figure 3: Attaching to PhotoVault process with cycript
We then print the current view hierarchy using recursiveDescription by issuing the following command:
[[UIApp keyWindow] recursiveDescription]

Figure 4: Current View Hierarchy with recursiveDescription
Reviewing the current view hierarchy, we see a number of references to PasswordBox. Let’s see if we can alter what is being displayed. To do that we can issue the following command:
[#viewAddress setHidden:YES].
In this case we are testing the first PasswordBox at 0x15f687f0.

Figure 5: Hiding the first password input box
After executing the command we note that the first PasswordBox disappeared:
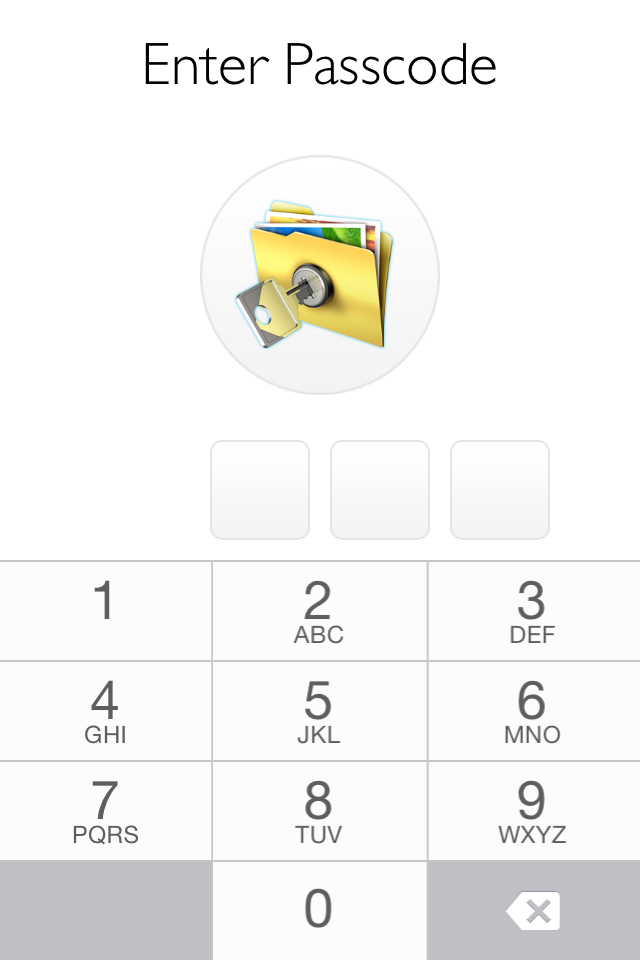
Figure 6: First password box hidden
Great, we can alter what is being displayed. Having obtained the current view, we now need to determine the controller. This can be accomplished with nextResponder as shown below. See references for details on nextResponder and the whole MVC model.
In a nutshell we keep calling nextResponder on the view until we hit a controller. In our case, we start with [#0x15f687f0 nextResponder] which returns <UIView: 0x15f68790> and then we call nextResponder on that like [#0x15f68790 nextResponder]. Eventually we hit a controller as shown:

Figure 7: Determining the View Controller
The WhiteLockScreenViewController controller seems to be responsible for the view. Earlier I dumped the class information with class-dump-z (not shown here). Examining the class revealed an interesting method called dismissLockScreen. Could it be that easy? As it turned out, it was. Simply calling the method as shown below was enough to bypass the lock screen:

Figure 8: Bypassing the lock screen with dismissLockScreen
Insecure Storage
During the setup I entered a passcode of 1337 to “protect” my photos. The next step, therefore, was to determine how the application was storing this passcode. Browsing the application directory revealed that the passcode was being stored in plaintext in the com.enchantedcloud.photovault.plistfile in /var/mobile/Applications/A025EF5F-ED84-4D82-A23D-BBCFE183F539/Library/Preferences.
As a side note I wonder what would be the effect of changing “Request Pin = 0”? It may be worth investigating further.

Figure 9: Passcode stored in plaintext
Not only is the PIN stored in plaintext, but the user has the option to password protect their albums. This again is stored in plaintext in the Albums.plist plist file.

Figure 10: Album password stored in plaintext
No Encryption
As if this wasn’t bad enough, the stored photos were not encrypted. This has already been pointed out elsewhere. Surprisingly enough, it remains the case as at the time of this writing. The pictures are stored in the /0 directory:

Figure 11: Location of unencrypted photos

Figure 12: Unencrypted view of stored photo
Reverse Engineering Private Photo Vault
Ok, so we have seen how to bypass the lock screen using cycript. However, let’s say that you wanted to go “under the hood “in order to achieve the same goal.
You could achieve this using:
- IDA Pro/Hopper
- LLDB
- Usbmuxd
- Debugserver
Environment Setup
Attach the mobile device to your host machine and launch tcprelay (usbmuxd directory) using the following syntax:
tcprelay.py -t <remote-port-to-forward><local-port-to-listen>

Figure 13: Launching tcprelay for debugging via USB
Tcprelay allows us to debug the application over USB as opposed to wifi, which can often be slow.
SSH into the device, start the debugserver, and attach to the PhotoVault process. Issue the following command:
debugserver *:8080 –a “PhoyoVault”

Figure 14: Launching debugserver on the mobile device
Launch lldb from your host machine, and connect to the listening debug server on the mobile device by issuing the following command from within lldb:
process connect connect://localhost:8080
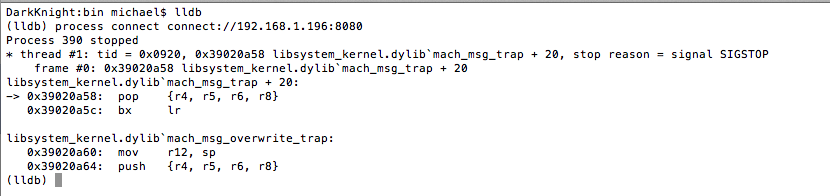
Figure 15: Connecting to debugserver with lldb
Decrypt Binary
Now that the environment is configured, we can start debugging. Decrypt the binary and open it in IDA. I used the following command to decrypt the binary:
DYLD_INSERT_LIBRARIES=dumpdecrypted_armv7.dylib /var/mobile/Applications/A025EF5F-ED84-4D82-A23D-BBCFE183F539/PhotoVault.app/PhotoVault mach -o decryption dumper
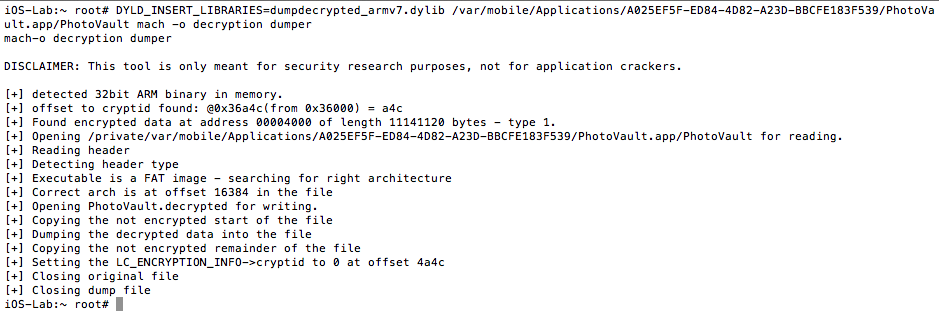
Figure 16:Decrypting the PhotoVault binary
At this point I usually check to see if the binary is a FAT binary (i.e. it supports many devices). The command for that is: otool –hV PhotoVault.decrypted

Figure 17: Determining if the binary is a FAT binary
If it is indeed a FAT binary, I strip the architecture for my device. Given I am running an iPhone 4S, I ran the following command:
lipo -thin armv7 -output PhotoVault-v7 PhotoVault.decrypted.
The PhotoVault-v7 binary is what we will analyze in IDA or Hopper (see the reference section for instructions on configuring lldb and debugserver).
Earlier we established that WhiteLockScreenViewController was the controller responsible for the lock screen. This will become important in a bit. If we enter an incorrect password, the application prints “Wrong Passcode – Try Again”. Our first step, therefore, is to find occurrences of this in IDA.
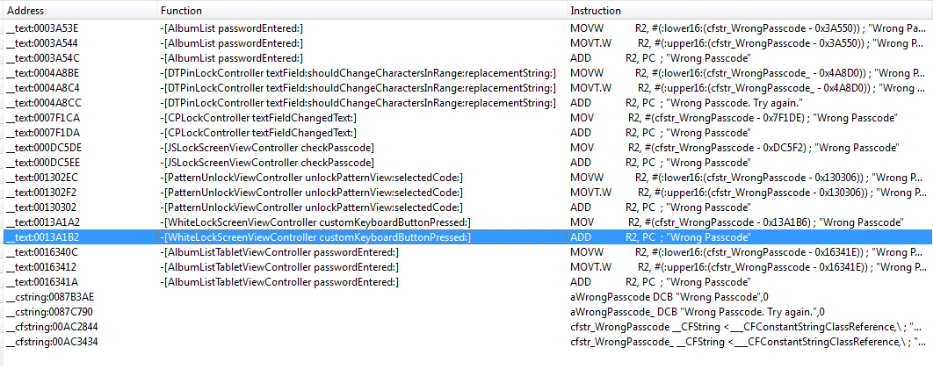
Figure 18: Searching for occurrences of “Wrong Passcode”
We see several occurrences, but any reference to WhiteLockScreenViewController should be of interest to us. Let’s investigate this more. After a brief examination we discover the following:

Figure 19: Examining WhiteLockScreenViewController customKeyboardButtonPressed
At 0013A102, the lockScreen:isPasswordCorrect method is called, and at 0013A114 the return value is checked. At 0013A118 a decision is made on how to proceed. If we entered an incorrect passcode, the application will branch to loc_13A146 and display “Wrong Passcode” as shown in the snippet below.

Figure 20: Wrong Passcode branch we need to avoid
Obviously, we want the application to branch to 0013A11A, because in that branch we see references to a selRef_lockScreen_didEnterCorrectPassword_ method.

Figure 21: Branch we are interested in taking
Let’s set breakpoint at 0013A110, right before the check for the return value is done. Before we can do that, we need to account for ASLR, so we must first determine the ASLR Offset on the device.

Figure 22: Breakpoint will set at 0013A110
To accomplish this we issue the following command from within our lldb session:
image list –o -f
The image is loaded at 0xef000 so the address we need to break on is the 0x000ef000 + 0013A110.

Figure 23: Determining ASLR offset
We set a breakpoint at 0x229110 with the following command: br s -a 0x229110.
From this point breakpoints will be calculated as ASLR Offset + IDA Offset.

Figure 24: Setting the breakpoint
With our breakpoint set, we go back to the device and enter an arbitrary passcode. The breakpoint is hit and we print the value of register r8 with p $r8.
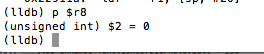
Figure 25: Examining the value in register r8
Given the value of zero, the TST.W R8, #0xFF instructions will see us taking the branch that prints “Wrong Passcode”. We need to change this value so that we take the other branch. To do that we issue the following command: register write r8 1

Figure 26: Updating the r8 register to 1
The command sets the value of register r8 to 1. We are almost there. But before we continue, let’s examine the branch we have taken. In that branch we see a call to lockScreen_didEnterCorrectPassword. So again, we search IDA for that function and the results show it references the PasswordManager class.
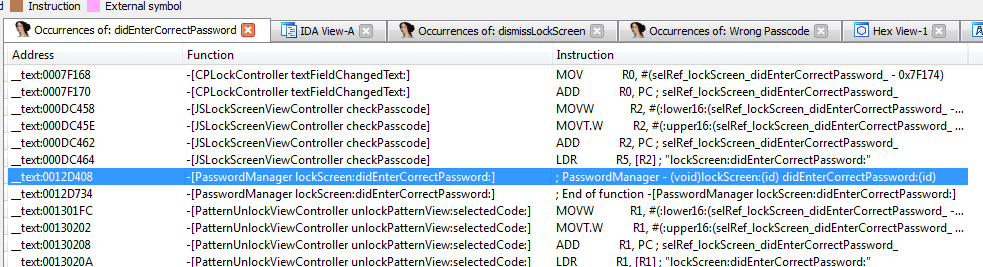
Figure 27: Searching IDA for occurences of lockScreen_didEnterCorrectPassword
We next examine that function where we notice several things happening:
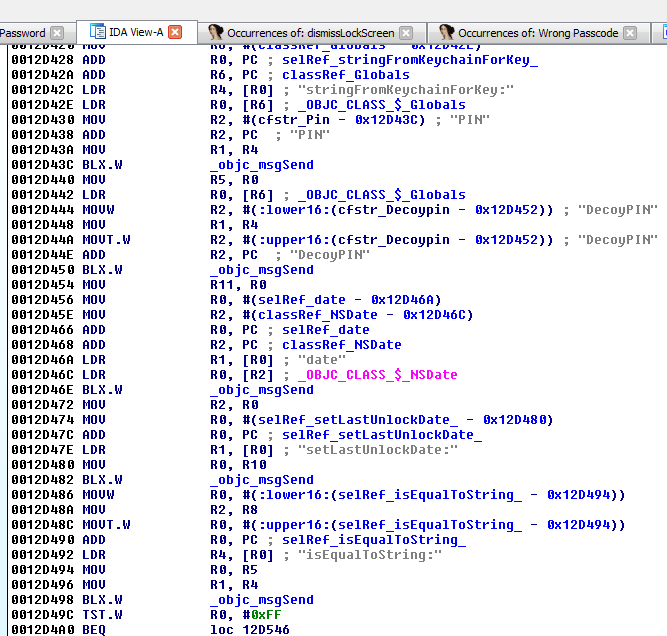
Figure 28: Examining lockScreen_didEnterCorrectPassword
In short, in this block the application reads the PIN stored on the device and compares it to the value we entered at 0012D498. Of course this check will fail, because we entered an incorrect PIN. Looking further at this function revealed a call to the familiar dismissLockScreen. Recall this is the function we called in cycript earlier.

Figure 29: Branch with dismissLockScreen
It seems then that we need to take this branch. To do that, we change the value in r0 so that we get our desired result when the TST instruction is called. This ends up tricking the application into thinking we entered the correct PIN. We set a breakpoint at 0012D49C (i.e. the point at which we test for the return value from isEqualToString). Recall we are still in the lockScreen_didEnterCorrectPassword method of the PasswordManager class.

Figure 30: Point at which the PIN is verified
We already know the check will fail, since we entered an incorrect PIN, so we update the value in r0 to 1.
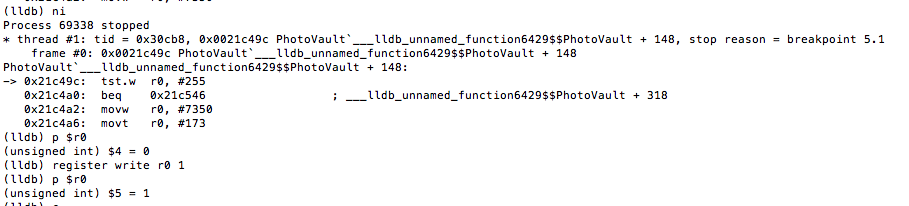
Figure 31: Updating r0 register to 1 to call dismissLockScreen
When we do that and continue execution, the dismissLockScreen method is called and the lock screen disappears, granting us access to the photos. So to recap the first patch allows us to call lockScreen_didEnterCorrectPassword. And then the second patch allows us to call dismissLockScreen, all with an arbitrary pin.
Let’s now look at the other applications.
My Media
Insecure Webserver
This was a very popular application in the app store. However, it suffered from some of the same vulnerabilities highlighted previously. What is interesting about this application is that it starts a web server on port 5555, which essentially allows users to manage their albums.
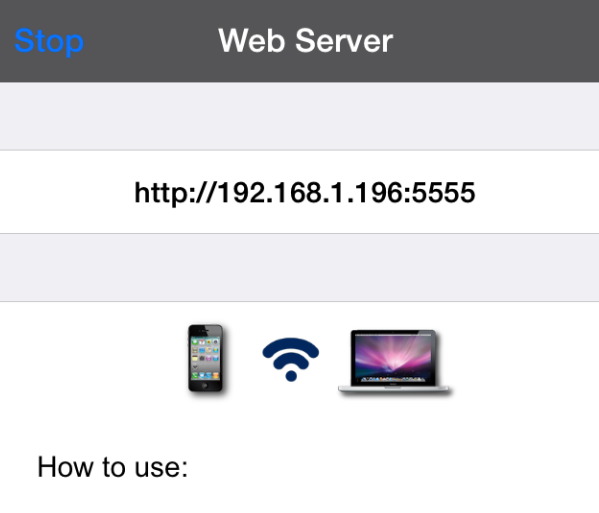
Figure 32: Web server started on port 5555
Browsing to the address results in the following interface:

Figure 33: My Media Wifi Manager
The first thing I noticed was that there was no authentication. Anybody on the same network could potentially gain access to the user’s albums. Looking a little deeper revealed that the application was vulnerable to common web application vulnerabilities. An example of this is stored cross-site scripting (XSS) in the Album name parameter:
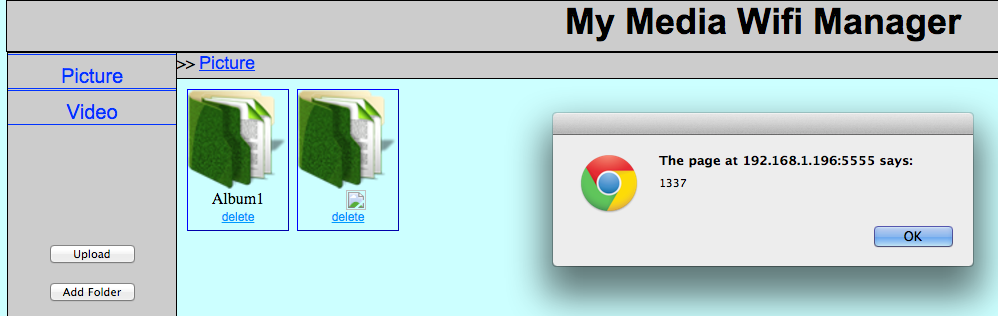
Figure 34: Stored XSS in Album name
Insecure Storage
Again, the photos were not encrypted (verified using the hex editor from earlier). Photos and videos were stored in the following location:
/var/mobile/Applications/61273D04-3925-41EF-BD63-C2B0BC128F70/Library/XFFile/Decoy/1/Picture/Album1

Figure 35: Insecure storage of photos
On the device, this looks like the following:

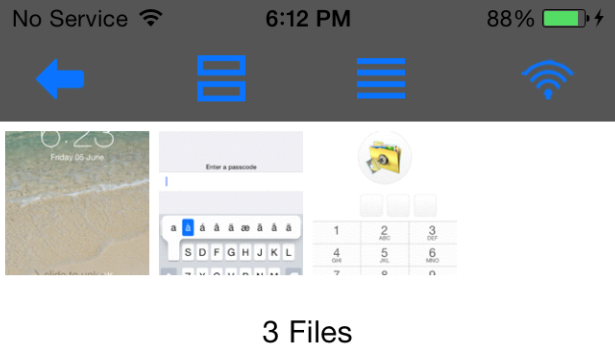
Figure 36:Albums and photos on device
One of the features of these password-protected photo vaults is the ability to setup decoys. If the user chooses to create a decoy, then when the decoy password is entered it takes them to a “fake” album. I created a decoy in this application and found that the photos were also not encrypted (not that I expected them to be). I created a decoy album and added a photo. The decoy photos were stored in the following location:
/var/mobile/Applications/B73BB177-CEB7-4576-BDFC-2408A0369D42/Library/XFFile/Decoy/2/Picture/Decoy Album
The application stored user credentials in an unencrypted sqlite database. The passcode required to access the application was 1234 and was tied to the administrative account as shown. This was the passcode I chose when I was configuring the application. I also created a decoy user. These credentials were stored plaintext in the users table.

Figure 37: Extracting credentials with sqlite
KeepSafe
Bypassing the Lock Screen
Again bypassing the lock screen was trivial.
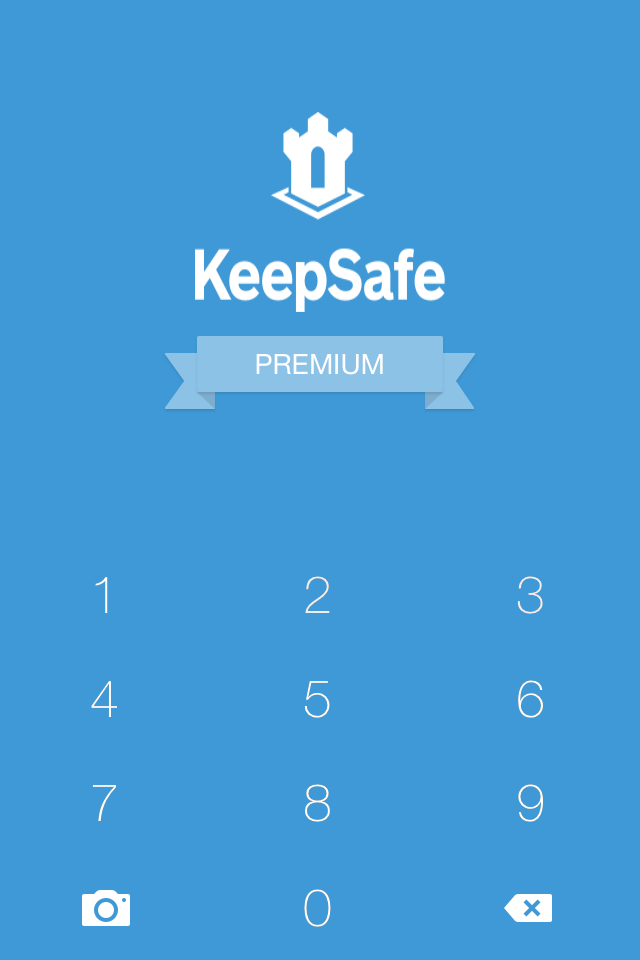
Figure 38: KeepSafe LockScreen
The lock screen could be bypassed by calling the showMainStoryboard method from the KeepSafe.AppDelegateclass. Again we attach to the process with cycript and this time we get the instance methods:
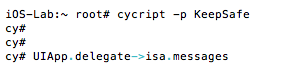
Examining the instance methods reveals the following methods:
And calling the showAccountStoryboard or showMainStoryboard methods as shown bypasses the lock screen:
Figure 39: Bypassing the lock screen
The application also allows the user to password protect each album. Each album is synced to the cloud.
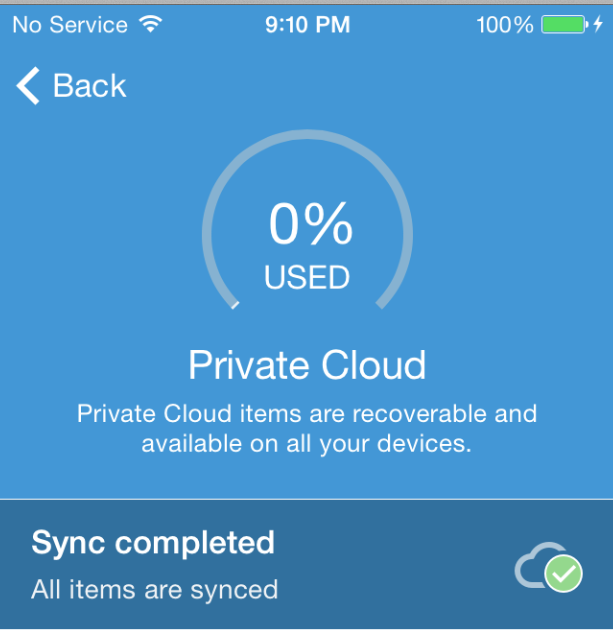
Figure 40: KeepSafe cloud storage
I discovered that the password for the albums was returned in plaintext from the server as shown:

Figure 41: Album password return in plaintext from the server
An attacker could therefore not only bypass the lockscreen but he could obtain the passcode for password protected albums as well.
Conclusion
Ok so let’s do a quick recap on what we were able to accomplish. We used:
- cycript to bypass the lock screens
- sqlite to extract sensitive information from the application databases
- plutil to read plist files and access sensitive information
- BurpSuite Pro to intercept traffic from the application
- IDA Pro to reverse the binary and achieve results similar to cycript
The scary part of this is that, on average, it took less than 30 minutes to gain access to the photos and user credentials for each application. The only exception was the use of IDA, and as we highlighted, we only did that to introduce you to and get you comfortable reading ARM assembly. In other words, it’s possible for an attacker to access your private photos in minutes.
In all cases it was trivial to bypass the lock screen protection. In short I found:
- No jailbreak detection routines
- Insecure storage of credentials
- Photos stored unencrypted
- Lock screens are easy to bypass
- Common web application vulnerabilities
Let me hasten to say that this research does not speak to ALL photo vault applications. I just grabbed what seemed to be the most popular and had a quick look. That said, I wouldn’t be surprised if others had similar issues, as developers often make incorrect assumptions (believing users will never have access to the file system).
What are some of the risks? First and foremost, if you are running these apps on a jailbroken device, it is trivial to gain access to them. And in the case of My Media, even if you are not on a jailbroken device, anyone could connect to the media server it starts up and access your data.
More importantly though is the fact that your data is not encrypted. A malicious app (some of which have popped up recently) could gain access to your data.
The next time you download one of these apps, keep in mind it may not be doing what you think it is doing. Better yet, don’t store “private” photos on your device in the first place.
References:
- http://www.zdziarski.com/blog/?p=3951
- Hacking and Securing iOS Applications: Stealing Data, Hijacking Software, and How to Prevent It
- http://www.cycript.org/
- http://cgit.sukimashita.com/usbmuxd.git/snapshot/usbmuxd-1.0.8.tar.gz
- http://resources.infosecinstitute.com/ios-application-security-part-42-lldb-usage-continued/
- https://github.com/stefanesser/dumpdecrypted
- https://developer.apple.com/library/ios/technotes/tn2239/_index.html#//apple_ref/doc/uid/DTS40010638-CH1-SUBSECTION34
- https://developer.apple.com/library/ios/documentation/UIKit/Reference/UIResponder_Class/#//apple_ref/occ/instm/UIResponder/nextResponder